
In this post I'll go over how to use the Nativescript camera plugin to take pictures, store and display those pictures in a simple image gallery, use Font Awesome icons in your app, and maintain state for the app data across runs.
(NOTE: Click here for an updated version of this post written for Nativescript Vue.)
Setup a new app project with the camera plugin
Nativescript 4.0 has just been released, so I'll be using the latest version for this blog post. I upgraded from 3.4 using the following command:
npm install -g nativescript
Now let's create a new app using the Nativescript CLI, run the Nativescript diagnostic check, and then running the Hello World app in the iOS simulator to make sure the Nativescript install is ok:
tns create NSimagegallery
cd NSimagegallery
tns doctor
tns run ios
First we'll need to install the camera plugin using the following command:
tns plugin add nativescript-camera
Now let's clean out the Hello World default app. First delete the "app/main-view-model.js" file since we won't be using it. Remove everything in "app/app.css" except for the import of the default light theme specified by @import '~nativescript-theme-core/css/core.light.css';
Modify "app/main-page.xml" so it contains:
<Page xmlns="http://schemas.nativescript.org/tns.xsd" backgroundSpanUnderStatusBar="true"   class="page-layout"  loaded="onLoaded">
    <ActionBar title="Picture Gallery">
    </ActionBar>
     <StackLayout>
        <Label id="buttonCamera" text="Take a Pic" tap="takePicture"  class="take-picture-icon"></Label>
        <Image class="picture-stack" stretch="aspectFit" id="imageCamera"/>
    </StackLayout>
</Page>
Modify "app/main-page.js" so it contains:
const cameraModule = require("nativescript-camera");
var currentPage;

function onLoaded(args) {
  currentPage = args.object;
  var buttonCamera = currentPage.getViewById("buttonCamera");
  if (cameraModule.isAvailable()) { //checks to make sure device has a camera
  } else {//ignore this on simulators for now
  }
  cameraModule.requestPermissions().then(//request permissions for camera
    success => { //have permissions
    },
    failure => {//no permissions for camera,disable picture button
      buttonCamera.isEnabled = false;
    }
  );
}
exports.onLoaded = onLoaded;

function takePicture() {
  cameraModule
    .takePicture({
      width: 300, //these are in device independent pixels
      height: 300, //only one will be respected depending on os/device if
      keepAspectRatio: true, //    keepAspectRatio is enabled.
      saveToGallery: false //Don't save a copy in local gallery, ignored by some Android devices
    })
    .then(picture => {
        let imageCamera = currentPage.getViewById("imageCamera");
        imageCamera.src = picture;
    });
};
exports.takePicture = takePicture
And finally add some styling by creating "app/main-page.css" containing:
.page-layout {
    background-color: white;
}
.take-picture-icon {
    horizontal-align: center;
    background-color: rgb(234, 234, 236);
    padding: 12;
    border-width: 1.2;
    border-color: black;
    border-radius: 14;
    margin-top: 20;
    color: black;
    font-size: 30;
}
.picture-stack {
    margin-top: 60;
}
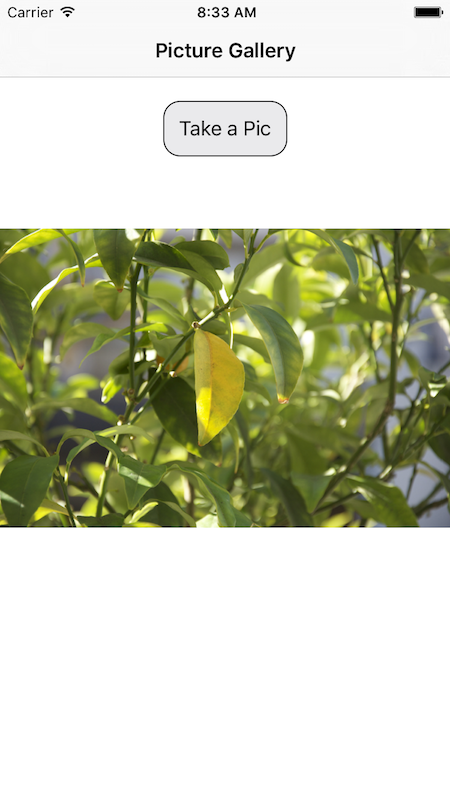
Run the app on the iOS simulator, tap the "Take Picture" button, choose an image from the simulator gallery, and you should see something like this:
Add camera permissions for Android and iOS builds
Besides local permissions, you will need to add explicit app permission keys before your app can be used in real iOS and Android builds. For iOS, edit "app/App_Resources/iOS/Info.plist" and add the following keys:
<key>NSPhotoLibraryUsageDescription</key>
<string>To access saved pictures</string>
<key>NSCameraUsageDescription</key>
<string>To take new pictures</string>
For Android, edit "app/App_Resources/Android/AndroidManifest.xml" and add the following permission:
<uses-permission android:name="android.permission.CAMERA"/>
Using Font Awesome 5 icons with Nativescript
Instead of using text for your picture button, you can make use of Font Awesome icons. The Font Awesome library can be used to inject scalable icons in your Nativescript app, saving you the headache of designing your own images and the multiple resolution versions needed for all possible screen sizes on Android and iOS. They're also incredibly easy to use in Nativescript apps.
First you'll need to download the latest fonts from the Font Awesome website. As of this post, the latest version if 5.0.10 and includes 991 free icons. The Font Awesome icon library is divided into solid, regular, light and brand versions. You can use their website to look at the free icons available.
After downloading and extracting the archive, you'll end up with a number of directories and files comprising the font set for different environments. Nativescript can make use of the TTF font format, so we'll look at the directory named "fontawesome-free-5.0.10/web-fonts-with-css/webfonts/". This contains the different icon families. Copy all the free TTF files ("fa-solid-900.ttf", "fa-regular.ttf" and "fa-brands.ttf") into "app/fonts" so that Nativescript will find the font files and make them available to your app. We'll add a new class to "main-page.css" that will allow us to use them inside the app. Add the following CSS class to "main-page.css":
.font-awesome {
  font-family: "Font Awesome 5 Free" ,"fa-solid-900","fa-regular-400","fa-brands-400";
}
When you wish to use a particular icon, you'll have to first lookup the unicode value for the icon. For this app, I'll use the Retro Camera solid icon, as the regular and light versions are only available as part of the Font Awesome Pro package. On the bottom of the info page, you'll see the unicode for this particular icon, which is f083. Whenever you wish to use an icon in your app, make note of the code, and then use the unicode formatted as  for the text of the label.
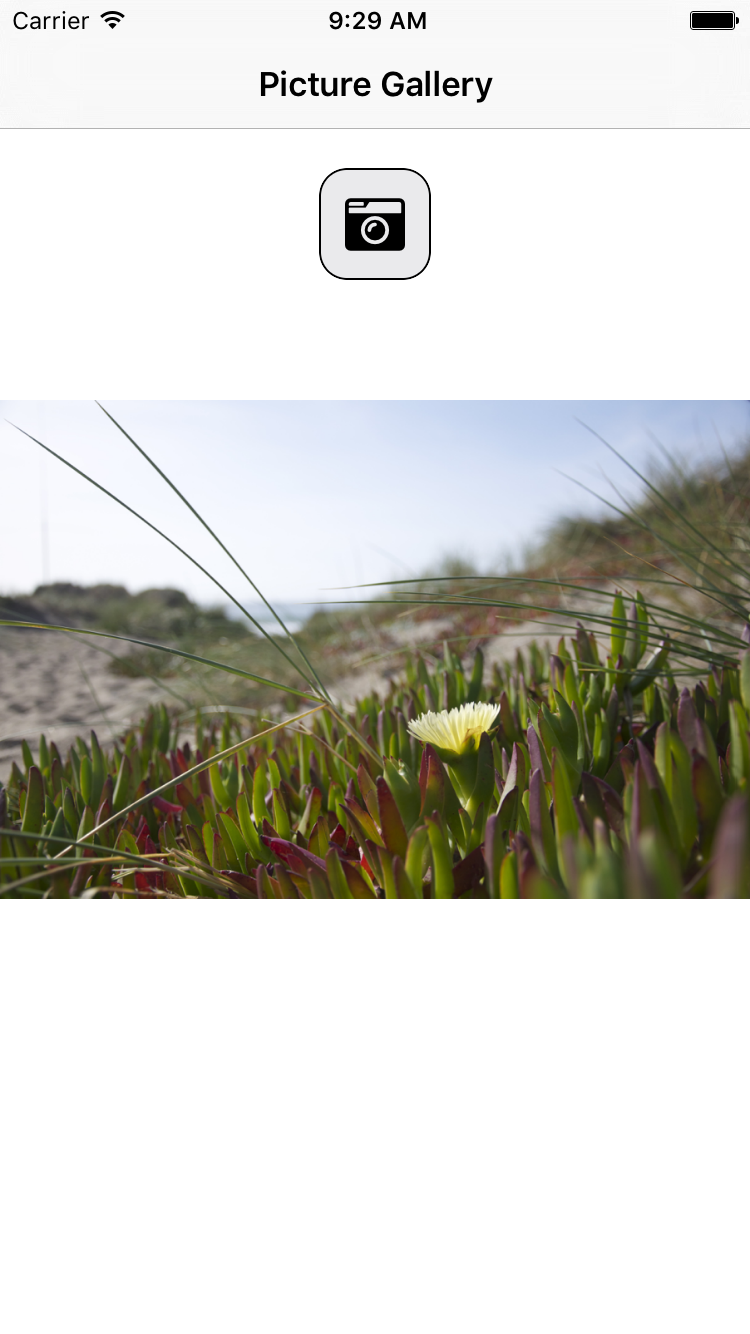
Let's update our app with this icon by changing the <Label id="buttonCamera" text="Take a Pic" tap="takePicture" class="take-picture-icon"></Label> line in "main-page.xml" to now be <Label id="buttonCamera" text="" tap="takePicture" class="font-awesome take-picture-icon "></Label>. Save and re-run the app and it should now look like:
Add a picture gallery to your app
Let's now make this app more useful, and instead of only displaying the last picture taken, we'll add a simple image gallery to display all images taken so far. We'll use the Nativescript Repeater component bound to an array of images in order to display them all as they are taken. We'll also encapsulate the array and picture functions we'll be adding into a function object for data binding with the XML layout.
Edit "app/main-page.xml" so it contains:
<Page xmlns="http://schemas.nativescript.org/tns.xsd" backgroundSpanUnderStatusBar="true" class="page-layout" loaded="onLoaded">
<ActionBar title="Picture Gallery">
</ActionBar>
<StackLayout>
<Label id="buttonCamera" text="" tap="{{takePicture}}" class="font-awesome take-picture-icon "></Label>
<StackLayout class="h-line"></StackLayout>
<ScrollView orientation="vertical">
<Repeater id="repeaterObj" items="{{arrayPictures}}">
<Repeater.itemTemplate >
<Image class="picture-stack" stretch="aspectFit" src="{{$value}}" />
</Repeater.itemTemplate>
</Repeater>
</ScrollView>
</StackLayout>
</Page>
I've added a "ScrollView" component containing the Repeater component so that we can scroll up and down as we add images with the camera. I also added references to bind the takePicture function and the arrayPictures array. The $value reference is used to bind each individual image of the array to instances of the Repeater.itemTemplate.
Edit "app/main-page.js" so it contains:
const cameraModule = require("nativescript-camera");
const Observable = require("tns-core-modules/data/observable").Observable;
const ObservableArray = require("data/observable-array").ObservableArray;
const fromObject = require("tns-core-modules/data/observable").fromObject;

var currentPage;
var cameraModel = new PhotoGalleryComponent();

function PhotoGalleryComponent() {
  var PhotoGalleryObj = new Observable();
  PhotoGalleryObj.arrayPictures = new ObservableArray();
  PhotoGalleryObj.takePicture = function() {
    cameraModule
      .takePicture({
        width: 300, //These are in device independent pixels
        height: 300, //Only one will be respected depending on os/device if
        keepAspectRatio: true, //    keepAspectRatio is enabled.
        saveToGallery: false //Don't save a copy in local gallery, ignored by some Android devices
      })
      .then(picture => {
        this.arrayPictures.unshift(picture);
      });
  };
  return PhotoGalleryObj;
}

function onLoaded(args) {
  currentPage = args.object;
  args.object.page.bindingContext = fromObject(cameraModel);
  var buttonCamera = currentPage.getViewById("buttonCamera");
  if (cameraModule.isAvailable()) {
    //checks to make sure device has a camera
  } else {
    //ignore this on simulators for now
  }
  cameraModule.requestPermissions().then(
    //request permissions for camera
    success => {
      //have permissions
    },
    failure => {
      //no permissions for camera,disable picture button
      buttonCamera.isEnabled = false;
    }
  );
}
exports.onLoaded = onLoaded;
The biggest changes in our Javascript code are the addition of the PhotoGalleryComponent function object and the use of Nativescript Observable classes. You can read up more on Nativescript data binding using these classes here. As you take pictures with the camera, it will add the images to the bound arrayPictures array, which will be automatically displayed by the Nativescript Repeater component.
Finally, add a little more styling by changing "app/main-page.css" so it contains:
.page-layout {
    background-color: white;
}
.take-picture-icon {
    horizontal-align: center;
    background-color: rgb(234, 234, 236);
    padding: 12;
    border-width: 1.2;
    border-color: black;
    border-radius: 14;
    margin-top: 20;
    margin-bottom: 20;
    color: black;
    font-size: 30;
}
.picture-stack {
    margin-top: 60;
}
.h-line {
    height: 1;
    background-color: black;
}
.font-awesome {
    font-family: "Font Awesome 5 Free" ,"fa-solid-900","fa-regular-400","fa-brands-400";
}
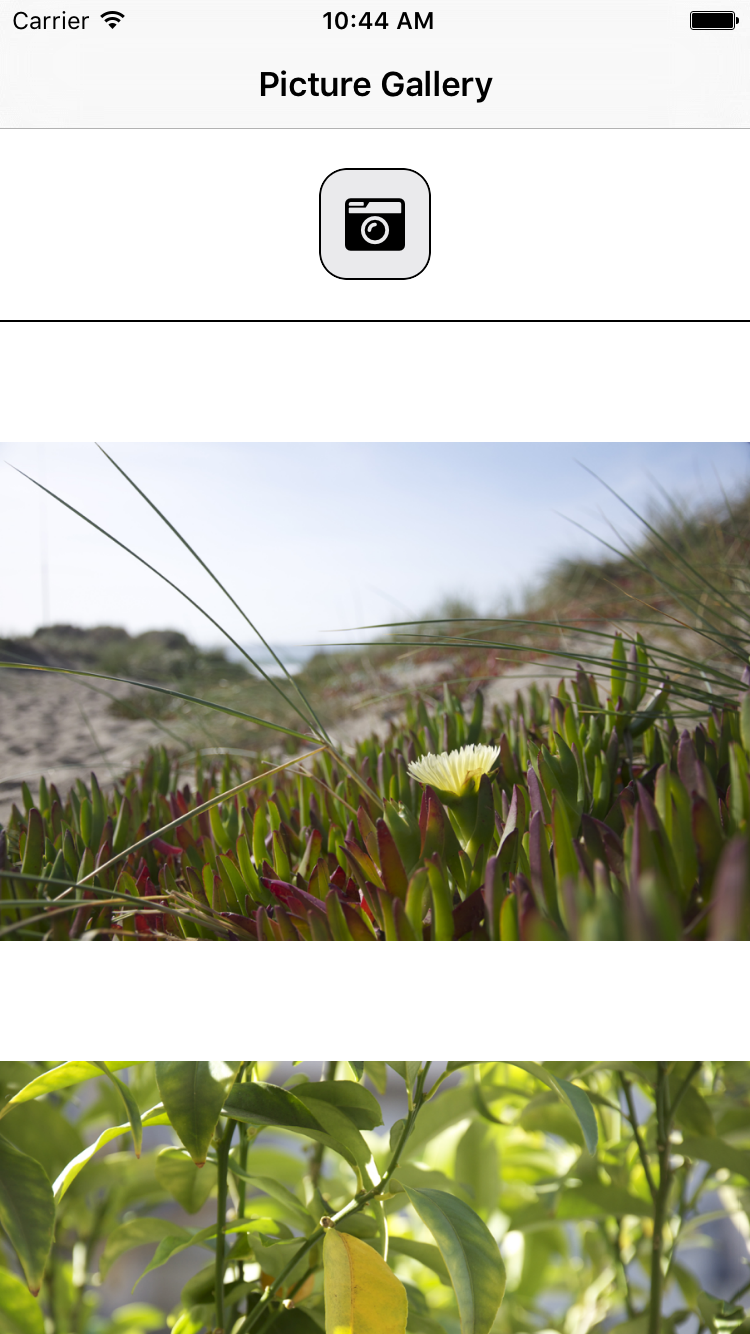
Run the app, add two or more pictures and you'll see each picture displayed vertically on the page:
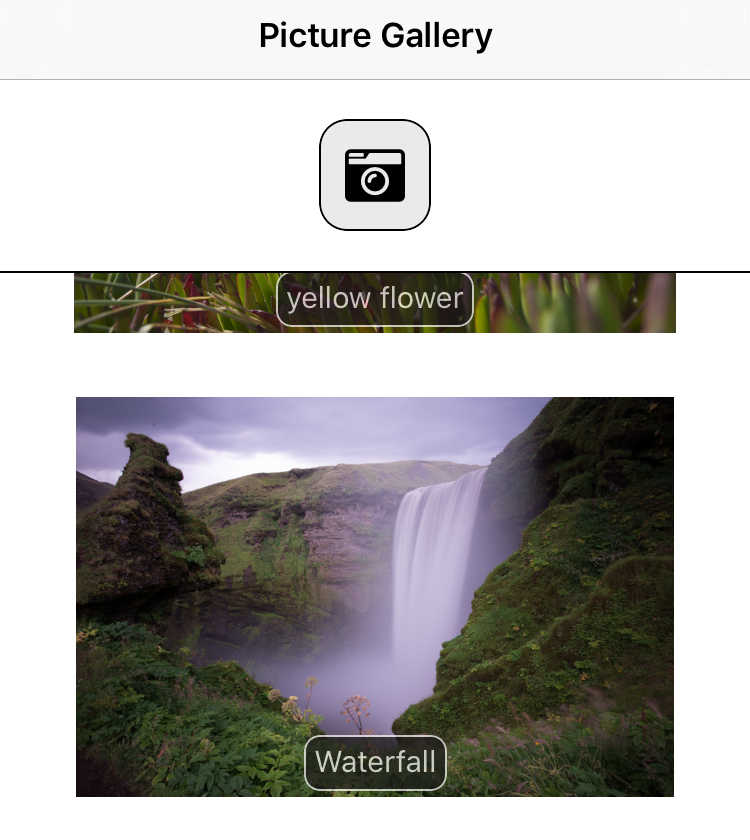
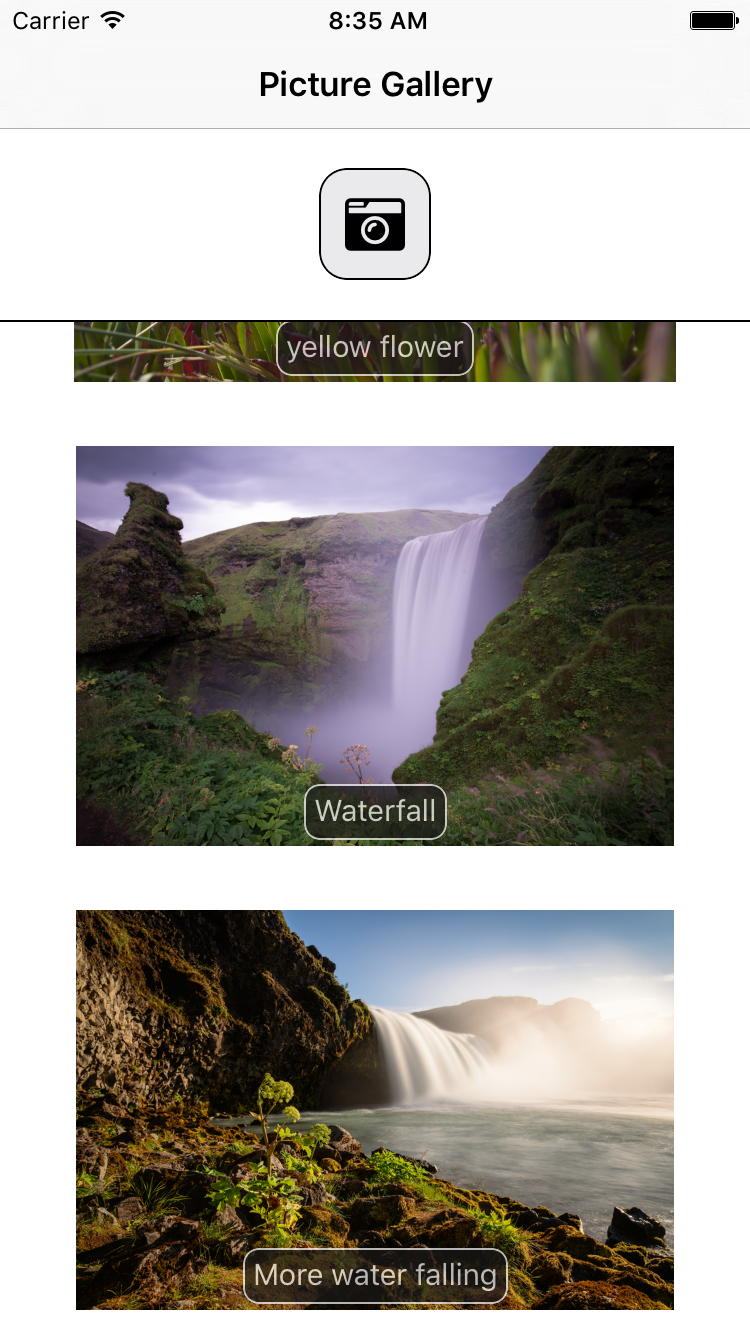
Add a details page for annotation and deletion of pictures
So far we've got a simple camera app with an image gallery, but it's a bit basic. Let's make it more realistic by only displaying small thumbnail images in the gallery, and adding a details page to view the image in full screen when a thumbnail is tapped. Once that's working, we'll add support for annotating each picture, and a control to delete individual pictures from the gallery.
First let's add a note field to the bottom of each picture in our gallery by changing the Repeater.itemTemplate in "app/main-page.xml" to be:
<Repeater.itemTemplate >
    <GridLayout cols="*,100" rows="*" id="gridObj" tap="tapPicture" >
        <Image class="picture-stack" col="0" colspan="2" row="0" stretch="aspectFit" src="{{$value}}"  />
        <StackLayout visibility="{{$value.note.length>0  ? 'visible' : 'hidden'}}" col="0" row="0" class="note-picture-wrapper" id="{{$value.name}}" >
            <Label  textWrap="true" verticalAlignement="bottom" text="{{$value.note}}" class="note-picture-text"></Label>
        </StackLayout>
    </GridLayout>
</Repeater.itemTemplate>
We'll only show the new label if there is any text for that picture, otherwise it will be hidden from view. Let's add some style to "app/main-page.css" for the new label:
.note-picture-wrapper {
  background-color: #1a1919;
  opacity: 0.7;
  border-width: 1;
  border-radius: 8;
  color: #ffffff;
  border-color: #ffffff;
  margin: 15;
  vertical-align: bottom;
  horizontal-align: center;
}
.note-picture-text {
  font-size: 15;
  vertical-align: center;
  horizontal-align: center;
  padding: 4;
}
Let's also change the image style in the gallery to make them smaller for a thumbnail view:
.picture-stack {
  margin-top: 20;
  margin-bottom: 12;
  height: 200;
}
Update "main-page.js" so it now contains:
const cameraModule = require("nativescript-camera");
const Observable = require("tns-core-modules/data/observable").Observable;
const ObservableArray = require("data/observable-array").ObservableArray;
const fromObject = require("tns-core-modules/data/observable").fromObject;
const frameModule = require("ui/frame");

var currentPage;
var cameraModel = new PhotoGalleryComponent();

function PhotoGalleryComponent() {
  var PhotoGalleryObj = new Observable();
  PhotoGalleryObj.arrayPictures = new ObservableArray();
  PhotoGalleryObj.takePicture = function() {
    cameraModule
      .takePicture({
        width: 300, //These are in device independent pixels
        height: 300, //Only one will be respected depending on os/device if
        keepAspectRatio: true, //    keepAspectRatio is enabled.
        saveToGallery: false //Don't save a copy in local gallery, ignored by some Android devices
      })
      .then(picture => {
        picture.note = "";
        this.arrayPictures.unshift(picture);
      });
  };
  PhotoGalleryObj.deletePicture = function(args) {
    let parentobj = args.object.parent.parent; //StackLayout
    let imgobj = parentobj.getChildAt(0); //image is the first child
    let pictureIndex = this.arrayPictures.indexOf(imgobj.src);
    this.arrayPictures.splice(pictureIndex, 1);
  };
  return PhotoGalleryObj;
}

exports.tapPicture = function(eventData) {
  var imgObj = eventData.object.getChildAt(0);
  navContextObj = {
    srcPicture: imgObj.src,
    cameraModel: cameraModel
  };
  var topmost = frameModule.topmost();
  topmost.navigate({
    moduleName: "full-image",
    context: navContextObj,
    animated: true,
    transition: {
      name: "slideLeft",
      duration: 80,
      curve: "linear"
    }
  });
};

function onLoaded(args) {
  currentPage = args.object;
  args.object.page.bindingContext = fromObject(cameraModel);
  var buttonCamera = currentPage.getViewById("buttonCamera");
  if (cameraModule.isAvailable()) {
    //checks to make sure device has a camera
  } else {
    //ignore this on simulators for now
  }
  cameraModule.requestPermissions().then(
    //request permissions for camera
    success => {
      //have permissions
    },
    failure => {
      //no permissions for camera,disable picture button
      buttonCamera.isEnabled = false;
    }
  );
}
exports.onLoaded = onLoaded;
We've added two new functions. First, tapPicture will navigate to a new page "full-image", and pass the cameraModel and the image itself as the new page context. This allows us to make changes to their properties on the new page and still have it bound to the main page of the app. Second, we also add a new function deletePicture to remove the picture from our gallery by removing it from the bound array of images.

So, let's add the files for the details page. Add "app/full-image.xml" with contents:
<Page xmlns="http://schemas.nativescript.org/tns.xsd"  backgroundSpanUnderStatusBar="true"  class="page-layout" navigatingTo="navigatingTo" navigatingFrom="navigatingFrom">
    <ActionBar title="Picture Details">
        <NavigationButton  text="" android.systemIcon="ic_menu_back" tap="onNavBtnTap"/>
    </ActionBar>
    <ScrollView orientation="vertical">
        <StackLayout>
            <Image class="picture-full" id="fullImage" stretch="aspectFit" src="{{srcPicture}}"/>                               <GridLayout cols="*,*" rows="60,30,*,300">
                <StackLayout col="1" row="0" class="delete-picture-icon-wrapper" id="{{srcPicture.name}}" tap="deletePicture">
                    <Label verticalAlignement="bottom" text="delete" class="delete-picture-icon"></Label>
                </StackLayout>
                <Label col="0" colspan="2" row="1" text="Note:" class="section-label"/>
                <TextView col="0" colspan="2" row="2" class="text-picture" hint="Add a note for this picture here" id="notePicture" editable="true" text="{{ srcPicture.note }} "/>
                <Label col="0" colspan="2" row="3" />
            </GridLayout>
        </StackLayout>
    </ScrollView>
</Page>
The extra label at the bottom with a height of 300 is there to provide some buffer space when the on-screen keyboard pops up while making changes to the image note text.
Add "app/full-image.css" with contents:
.page-layout {
  background-color: white;
}
.delete-picture-icon {
  font-size: 15;
  vertical-align: center;
  horizontal-align: center;
}
.delete-picture-icon-wrapper {
  background-color: #000000;
  border-width: 1;
  border-radius: 8;
  color: #ffffff;
  border-color: #ffffff;
  margin: 15;
  vertical-align: center;
  horizontal-align: right;
  height: 30;
  width: 60;
}
.text-picture {
  border-width: 1;
  border-style: solid;
  border-color: #01060c;
  height: 80;
  background-color: rgb(235, 233, 233);
}
.section-label {
  background-color: #292b2b;
  border-width: 1;
  border-style: solid;
  border-color: #01060c;
  color: white;
  padding-left: 10;
  padding-top: 5;
  padding-bottom: 5;
}
.picture-full {
  border-width: 1;
  border-color: gray;
}
And finally add "app/full-image.js" with contents:
var frameModule = require("ui/frame");
var cameraModel;

exports.navigatingTo = function(args) {
  args.object.bindingContext = args.context;
  cameraModel = args.context.cameraModel;
};
exports.onNavBtnTap = function(args) {
  var topmost = frameModule.topmost();
  topmost.goBack();
};
exports.deletePicture = function(args) {
  cameraModel.deletePicture(args);
  exports.onNavBtnTap();
};
You'll see that with the context binding from the main page, the contents of the new page are minimal. Run the app and you should experience something like this:
Maintain image gallery state
Now we have a functional image gallery app that allows us to add new pictures from the camera, annotate them and delete images. The biggest problem now is that when we close the app and re-open it, all the images and their notes will be gone. Our final step to making this a useful app is to maintain the state of the images and their associated notes across app runs. In order to maintain state, we'll need to start saving pictures as files on the device. We'll also need to maintain an array of filenames and notes that are saved whenever changes are made, and reloaded once the app is run after being closed.
We'll need a few more library functions so add the following to the top of "app/main-page.js":
const applicationSettings = require("application-settings");
const fsModule = require("tns-core-modules/file-system");
const imageSourceModule = require("tns-core-modules/image-source");
const utilsModule = require("utils/utils");
var initFlag = 0;
The initFlag variable will be used to control when to run initialization routines only when the app first loads the main page. applicationSettings is what will be used to save and load application state on the device. fsModule will let us save and load the pictures to local device storage along with the imageSourceModule Nativescript library for working with images. Finally, the utilsModule will be used for file cleanup and garbage collection of memory on the Android platform.
Modify the PhotoGalleryComponent so it now contains the following:
function PhotoGalleryComponent() {
  var PhotoGalleryObj = new Observable();
  PhotoGalleryObj.arrayPictures = new ObservableArray();
  PhotoGalleryObj.takePicture = function() {
    cameraModule
      .takePicture({
        width: 300, //These are in device independent pixels
        height: 300, //Only one may be respected depending on os/device if
        keepAspectRatio: true, //    keepAspectRatio is enabled.
        saveToGallery: false //Don't save a copy in local gallery, ignored by some Android devices
      })
      .then(picture => {
        imageSourceModule.fromAsset(picture).then(
          savedImage => {
            let filename = "image" + "-" + new Date().getTime() + ".png";
            let folder = fsModule.knownFolders.documents();
            let path = fsModule.path.join(folder.path, filename);
            savedImage.saveToFile(path, "png");
            var loadedImage = imageSourceModule.fromFile(path);
            loadedImage.filename = filename;
            loadedImage.note = "";
            this.arrayPictures.unshift(loadedImage);
            this.storeData();
            if (currentPage.android) {
              let tmpfolder = fsModule.Folder.fromPath(
                utilsModule.ad
                  .getApplicationContext()
                  .getExternalFilesDir(null)
                  .getAbsolutePath()
              );
              tmpfolder.getEntities().then(
                function(entities) {
                  entities.forEach(function(entity) {
                    if (entity.name.substr(0, 5) == "NSIMG") {
                      var tmpfile = tmpfolder.getFile(entity.name);
                      tmpfile.remove();
                    }
                  });
                },
                function(error) {
                  console.log(error.message);
                }
              );
              utilsModule.GC(); //trigger garbage collection for android
            }
          },
          err => {
            console.log("Failed to load from asset");
          }
        );
      });
  };

  PhotoGalleryObj.deletePicture = function(args) {
    const documents = fsModule.knownFolders.documents();
    let parentobj = args.object.parent.parent; //StackLayout
    let imgobj = parentobj.getChildAt(0); //image is the first child
    const filename = imgobj.src.filename;
    var file = documents.getFile(filename);
    file.remove();
    let pictureIndex = this.arrayPictures.indexOf(imgobj.src);
    this.arrayPictures.splice(pictureIndex, 1);
    this.storeData();
  };
  PhotoGalleryObj.storeData = function() {
    let localArr = [];
    for (var i = 0; i < this.arrayPictures.length; i++) {
      let entry = this.arrayPictures.getItem(i);
      localArr.push({ note: entry.note, filename: entry.filename });
    }
    applicationSettings.setString("localdata", JSON.stringify(localArr));
    if (this.arrayPictures.length) {//hack to trigger refresh of bound image array
      var loadedImage = this.arrayPictures.shift();
      this.arrayPictures.unshift(loadedImage);
    }
  };
  PhotoGalleryObj.loadData = function() {
    let strData = applicationSettings.getString("localdata");
    if (strData && strData.length) {
      let localArr = JSON.parse(strData);
      for (var i = localArr.length - 1; i > -1; i--) {
        let entry = localArr[i];
        const folder = fsModule.knownFolders.documents();
        const path = fsModule.path.join(folder.path, entry.filename);
        var loadedImage = imageSourceModule.fromFile(path);
        loadedImage.filename = entry.filename;
        loadedImage.note = entry.note;
        this.arrayPictures.unshift(loadedImage);
      }
    }
  };
  return PhotoGalleryObj;
}
After taking a picture, we will now save the picture as an image file to the application's local storage, and use this image source in our bound array for the app. Anytime a change is made by the addition or removal of a picture, we'll call the new function storeData to save the array of images with attached notes and filenames to app storage. deletePicture will now delete the image file and also call storeData whenever the user removes a picture from the gallery. On the Android platform, the Nativescript camera plugin will also save a local temp copy of each picture which we remove manually in the takePicture function to reduce storage consumption on the device, as well as invoke the Android garbage collection routine.
Inside storeData you'll see that I added the removal and re-addition of an image to the bound image array whenever a change is made. This is to trigger a refresh of the Repeater image display, as otherwise changes to the note field aren't refreshed automatically anymore. This is most likely due to loaded image files being stored as Image Source objects instead of Image Assets, as Image Source objects don't inherit from the base Observable class.
Modify the onLoaded function in "app/main-page.js" to reflect the new initialization process:
function onLoaded(args) {
  args.object.page.bindingContext = fromObject(cameraModel);
  if (initFlag == 0) {
    currentPage = args.object;
    var buttonCamera = currentPage.getViewById("buttonCamera");
    if (cameraModule.isAvailable()) {
      //checks to make sure device has a camera
    } else {
      //ignore this on simulators for now
    }
    cameraModule.requestPermissions().then(
      //request permissions for camera
      success => {
        //have permissions
      },
      failure => {
        //no permissions for camera,disable picture button
        buttonCamera.isEnabled = false;
      }
    );
    cameraModel.loadData();
    initFlag = 1;
  }
}
When the app is first run after being closed, it will load any previously saved images and notes into the image gallery, and not repeat initialization on repeat visits to the main page after returning from the details page or from switching between running apps.
Finally, we'll add a new function to "app/full-image.js" that is invoked whenever the app returns from the details page. This will save any note changes made to the picture without requiring the user to explicitly save updates to that field.
exports.navigatingFrom = function(args) {
  cameraModel.storeData();
}
And that's it, if you run the complete app after these changes, you'll be able to add and delete pictures and have the gallery reloaded if you close and re-open the app.
If you'd like to download the final source files for a quick start, you can download them from Github.