
My previous post showed how to create a Nativescript app with a customized splashscreen. This works well except on the iPhone X, where you'll have a white bar on the bottom of your splashscreen. I'll go over some basics for developers new to iOS with Nativescript and then discuss the iPhone X fix in detail.
- The current version of Nativescript requires at least iOS 8.2 to work correctly due to some changes made to it's core modules package. Most likely you'll just target 9.0 and above since there aren't that many devices with iOS 8. You will set this in your main app properties page in Xcode as shown in the image below.
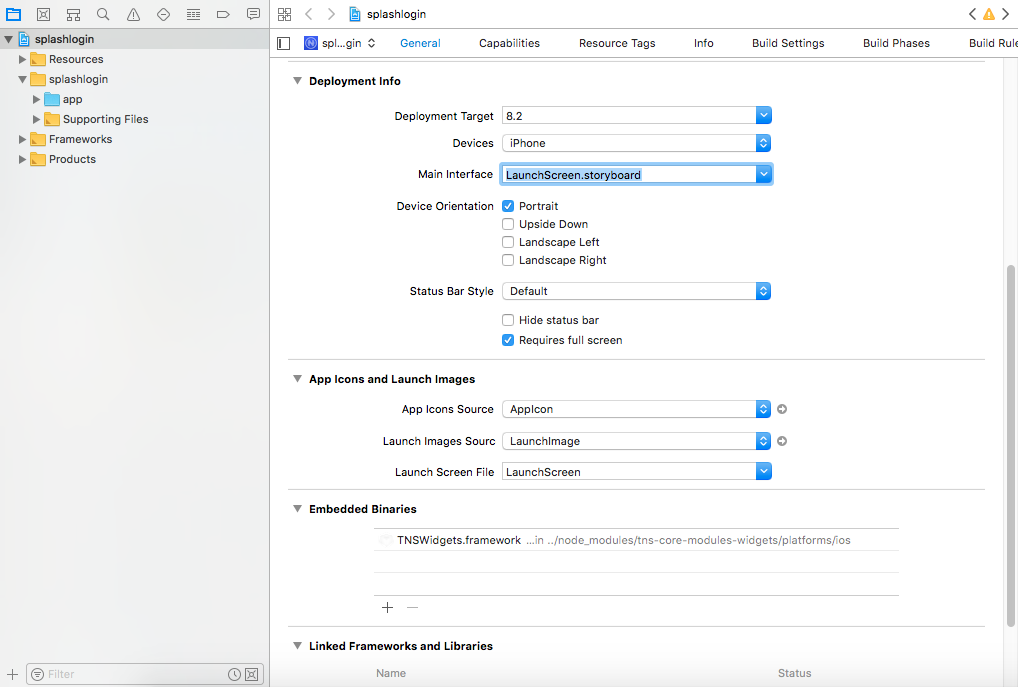
- You should restrict your app to only support iPhone and a portrait view unless you've already added design support in CSS or in your code for landscape and/or iPad screens. This is also set in your main app properties page under Devices and Device Orientation as shown in the image above.
iPhone X splashscreen fix
The iPhone X has introduced new screen design rules and some significant changes with Xcode 9.0 to support them. If you run the splashlogin app we've just created on an iPhone X, you'll end up with a white bar on the bottom of the splashscreen during launch. The solution to this requires modifying the app's Xcode project and making some changes to the AspectFill image and its bottom layout constraints. Let's go over the steps in detail used to fix the splashlogin app from my last post.
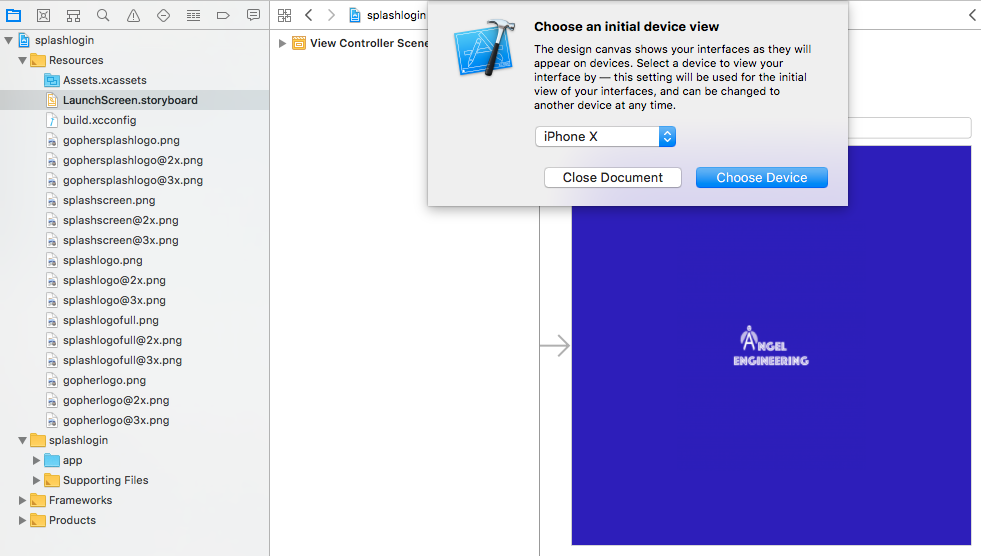
First, open Xcode and load the project file generated by Nativescript for your app. This can be found under "platforms/ios/splashlogin.xcodeproj". Expand the root "splashlogin" object on your project directory, and then click on the "Launchscreen.storyboard" entry to select it. Xcode will ask you for an initial device view, so select iPhone X and click on "Choose Device".
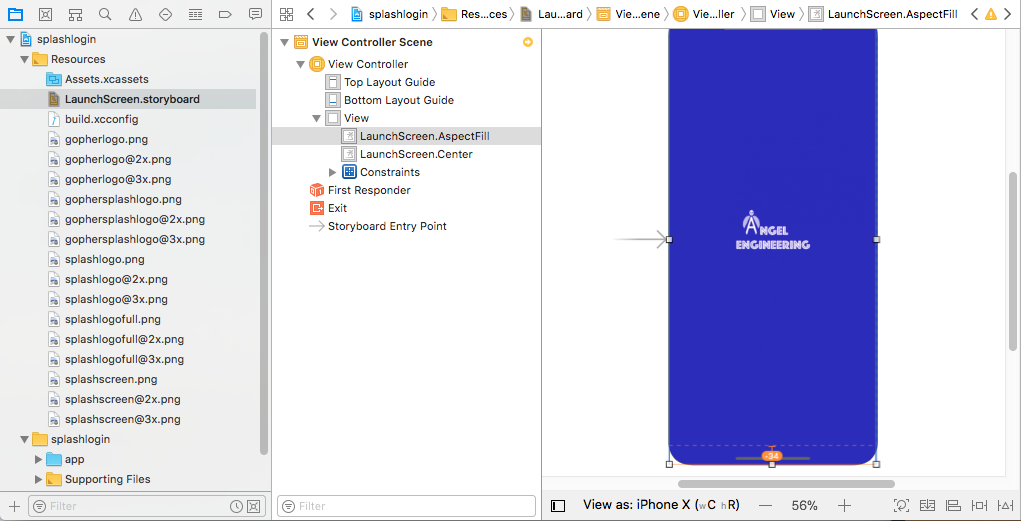
Now, expand the "View Controller Scene" hierarchy and click on "LaunchScreen.AspectFill" to show your current launchscreen overlaid on an iPhone X. You'll see that the bottom of the splashscreen image does not cover a small white area on the bottom of the device. Click on the iPhone to bring up the resize box and markers and drag the bottom of your fill image to cover the bottom of the iPhone screen. After stretching your AspectFill image to cover the screen, you'll see an error line in red for your bottom constraint so we'll need to fix that next.

Click on "LaunchScreen.Center" and then click on the iPhone to bring up the resize box for this image. Now click on the bottom toolbar's "Add Constraint" button to bring up a new dialog.
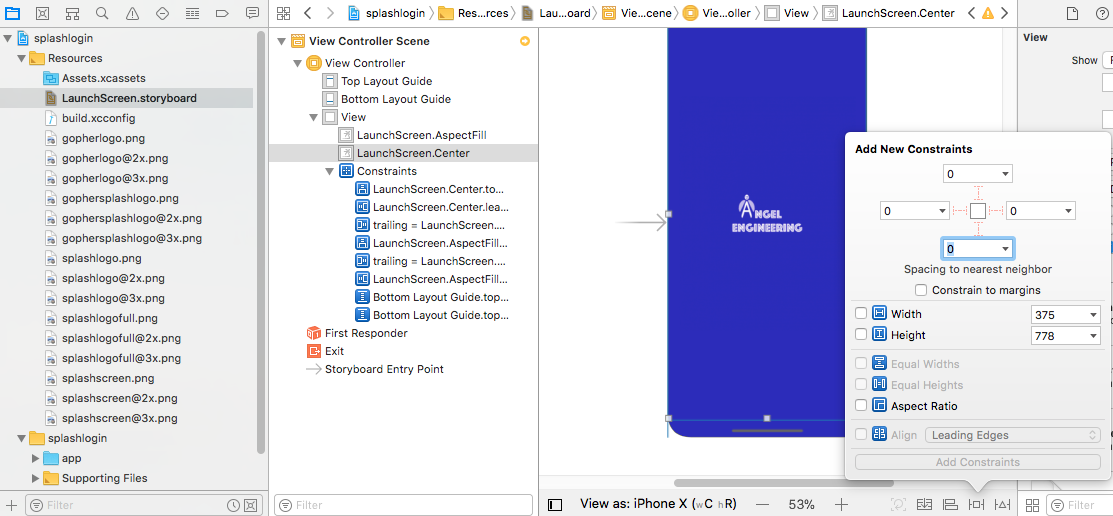
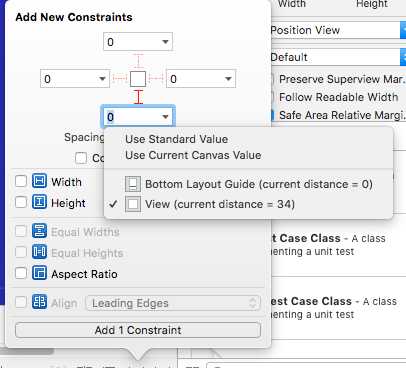
Select the bottom border dropdown, and then select the "View (current distance = 34)" option from the dropdown choices. Now change the number to 0 for the bottom border.
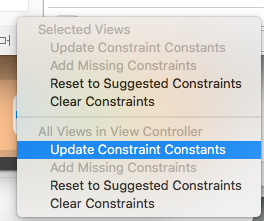
Finally, click on the "Resolve auto-layout issues" button on the bottom toolbar and select the "Update Constraint Constants" option.
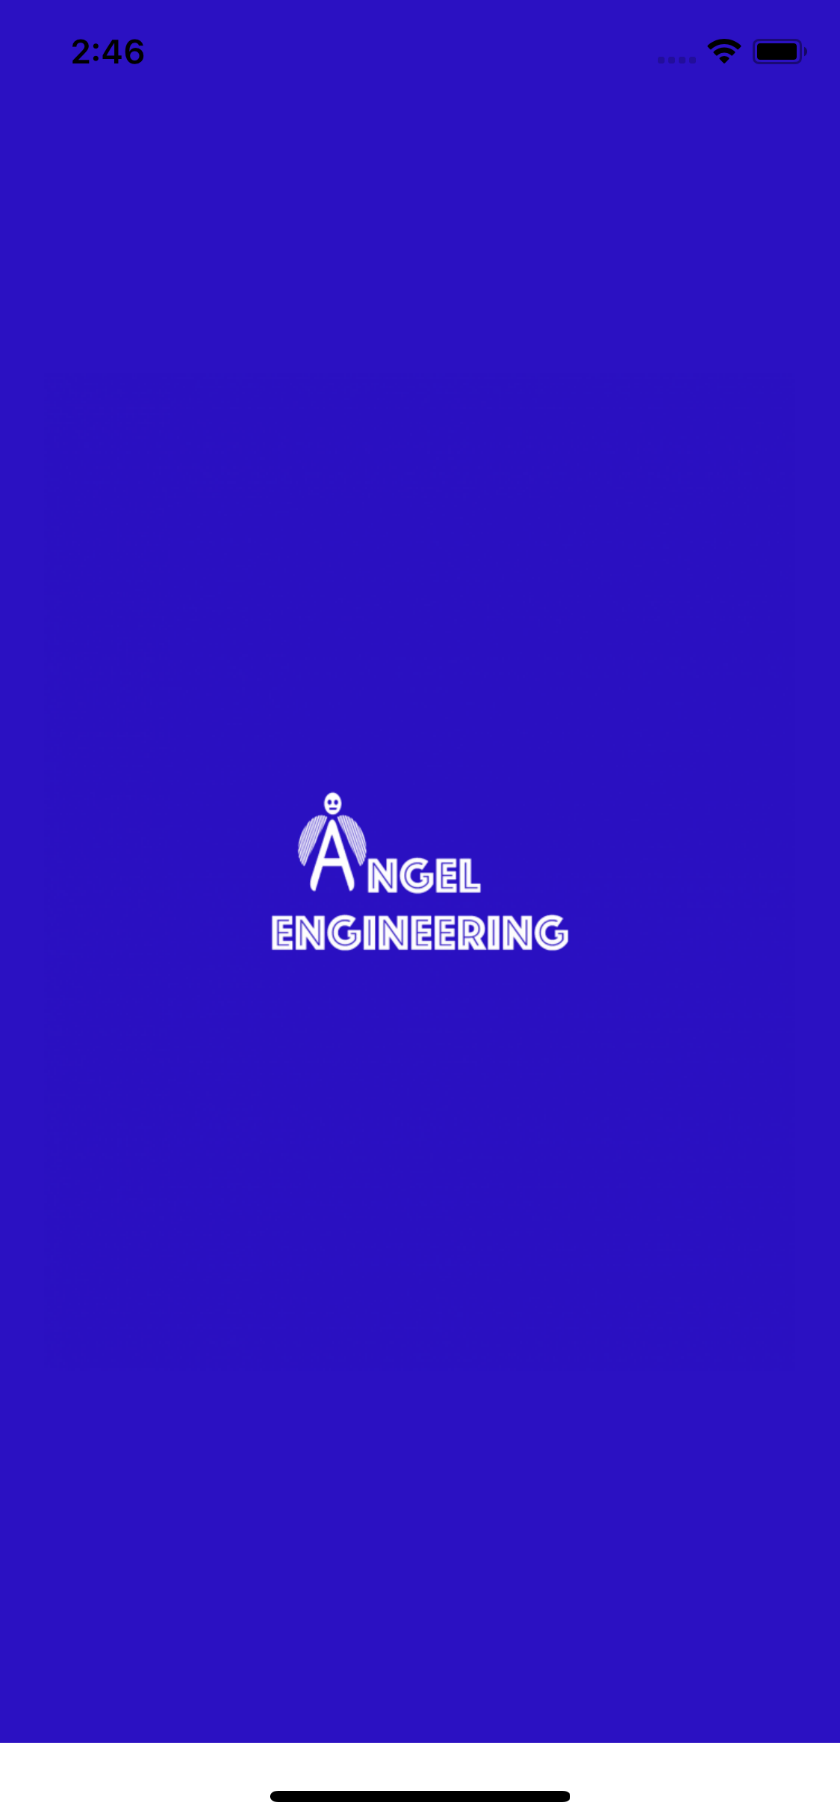
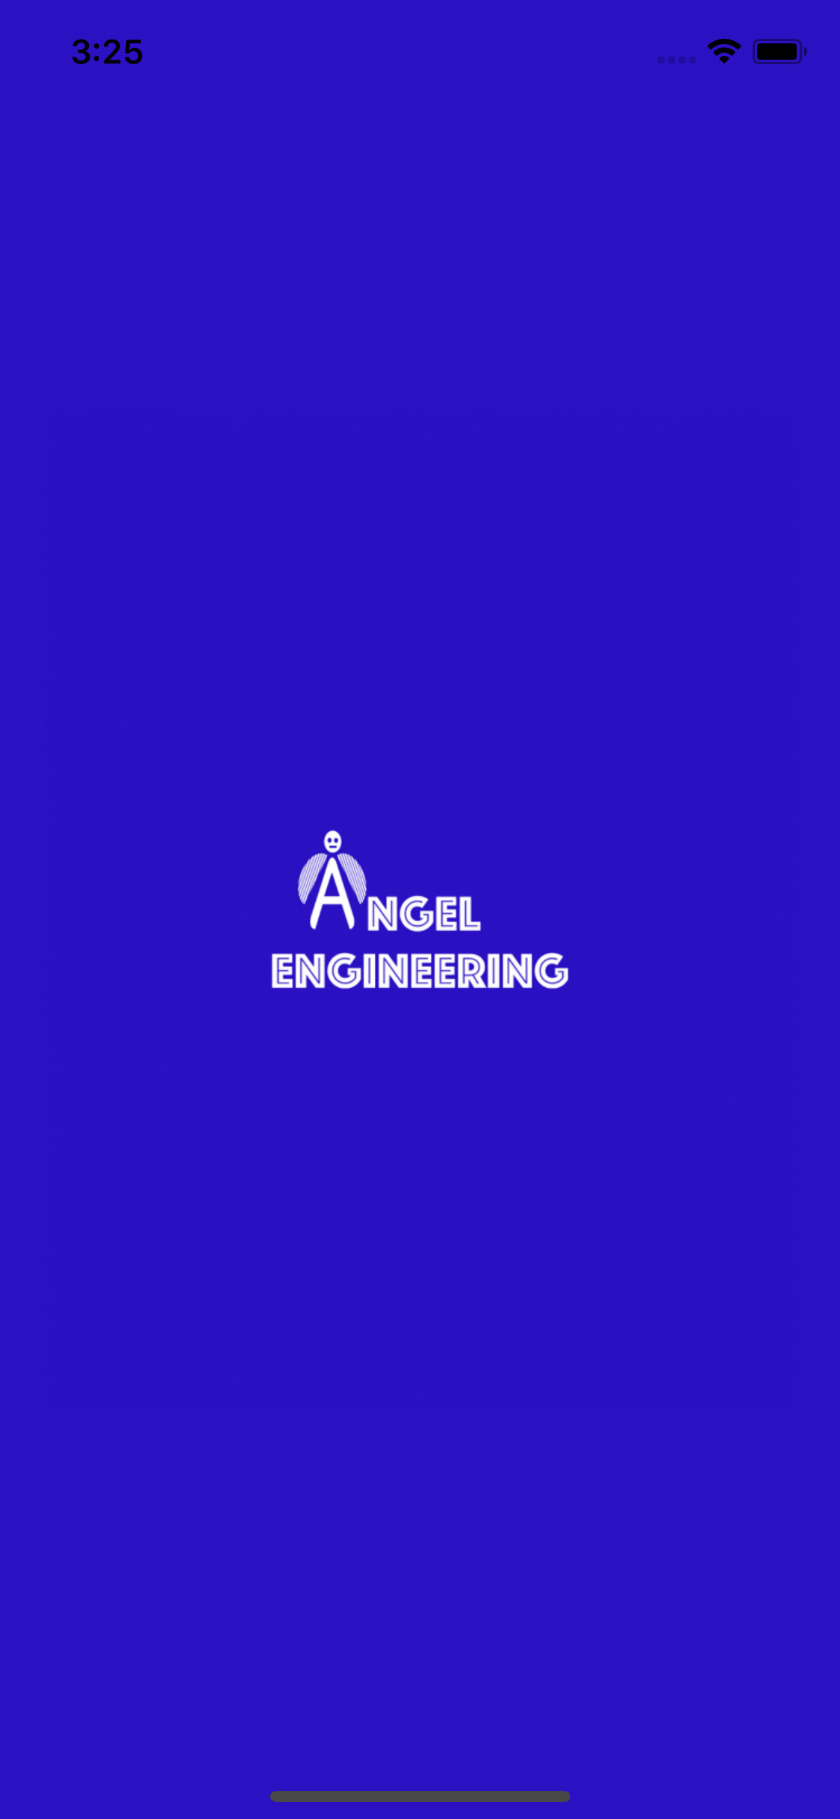
Run your app again on the iPhone X simulator, and you should now see a full splashscreen image covering the entire device.
Making further changes to your app and rebuilding with the Nativescript CLI should not affect these fixes. But, you will have to perform these fixes again if you remove the iOS platform and re-add it, since this recreates your Xcode project from scratch.
As Eddy points out in the comments below, you should save the updated "LaunchScreen.storyboard" file to your project's "app/App_Resources/iOS" folder. That way your changes are persisted even if you remove and re-add the iOS platform while developing your app.